
Narrative Mode
Keyboard Shortcut: 2
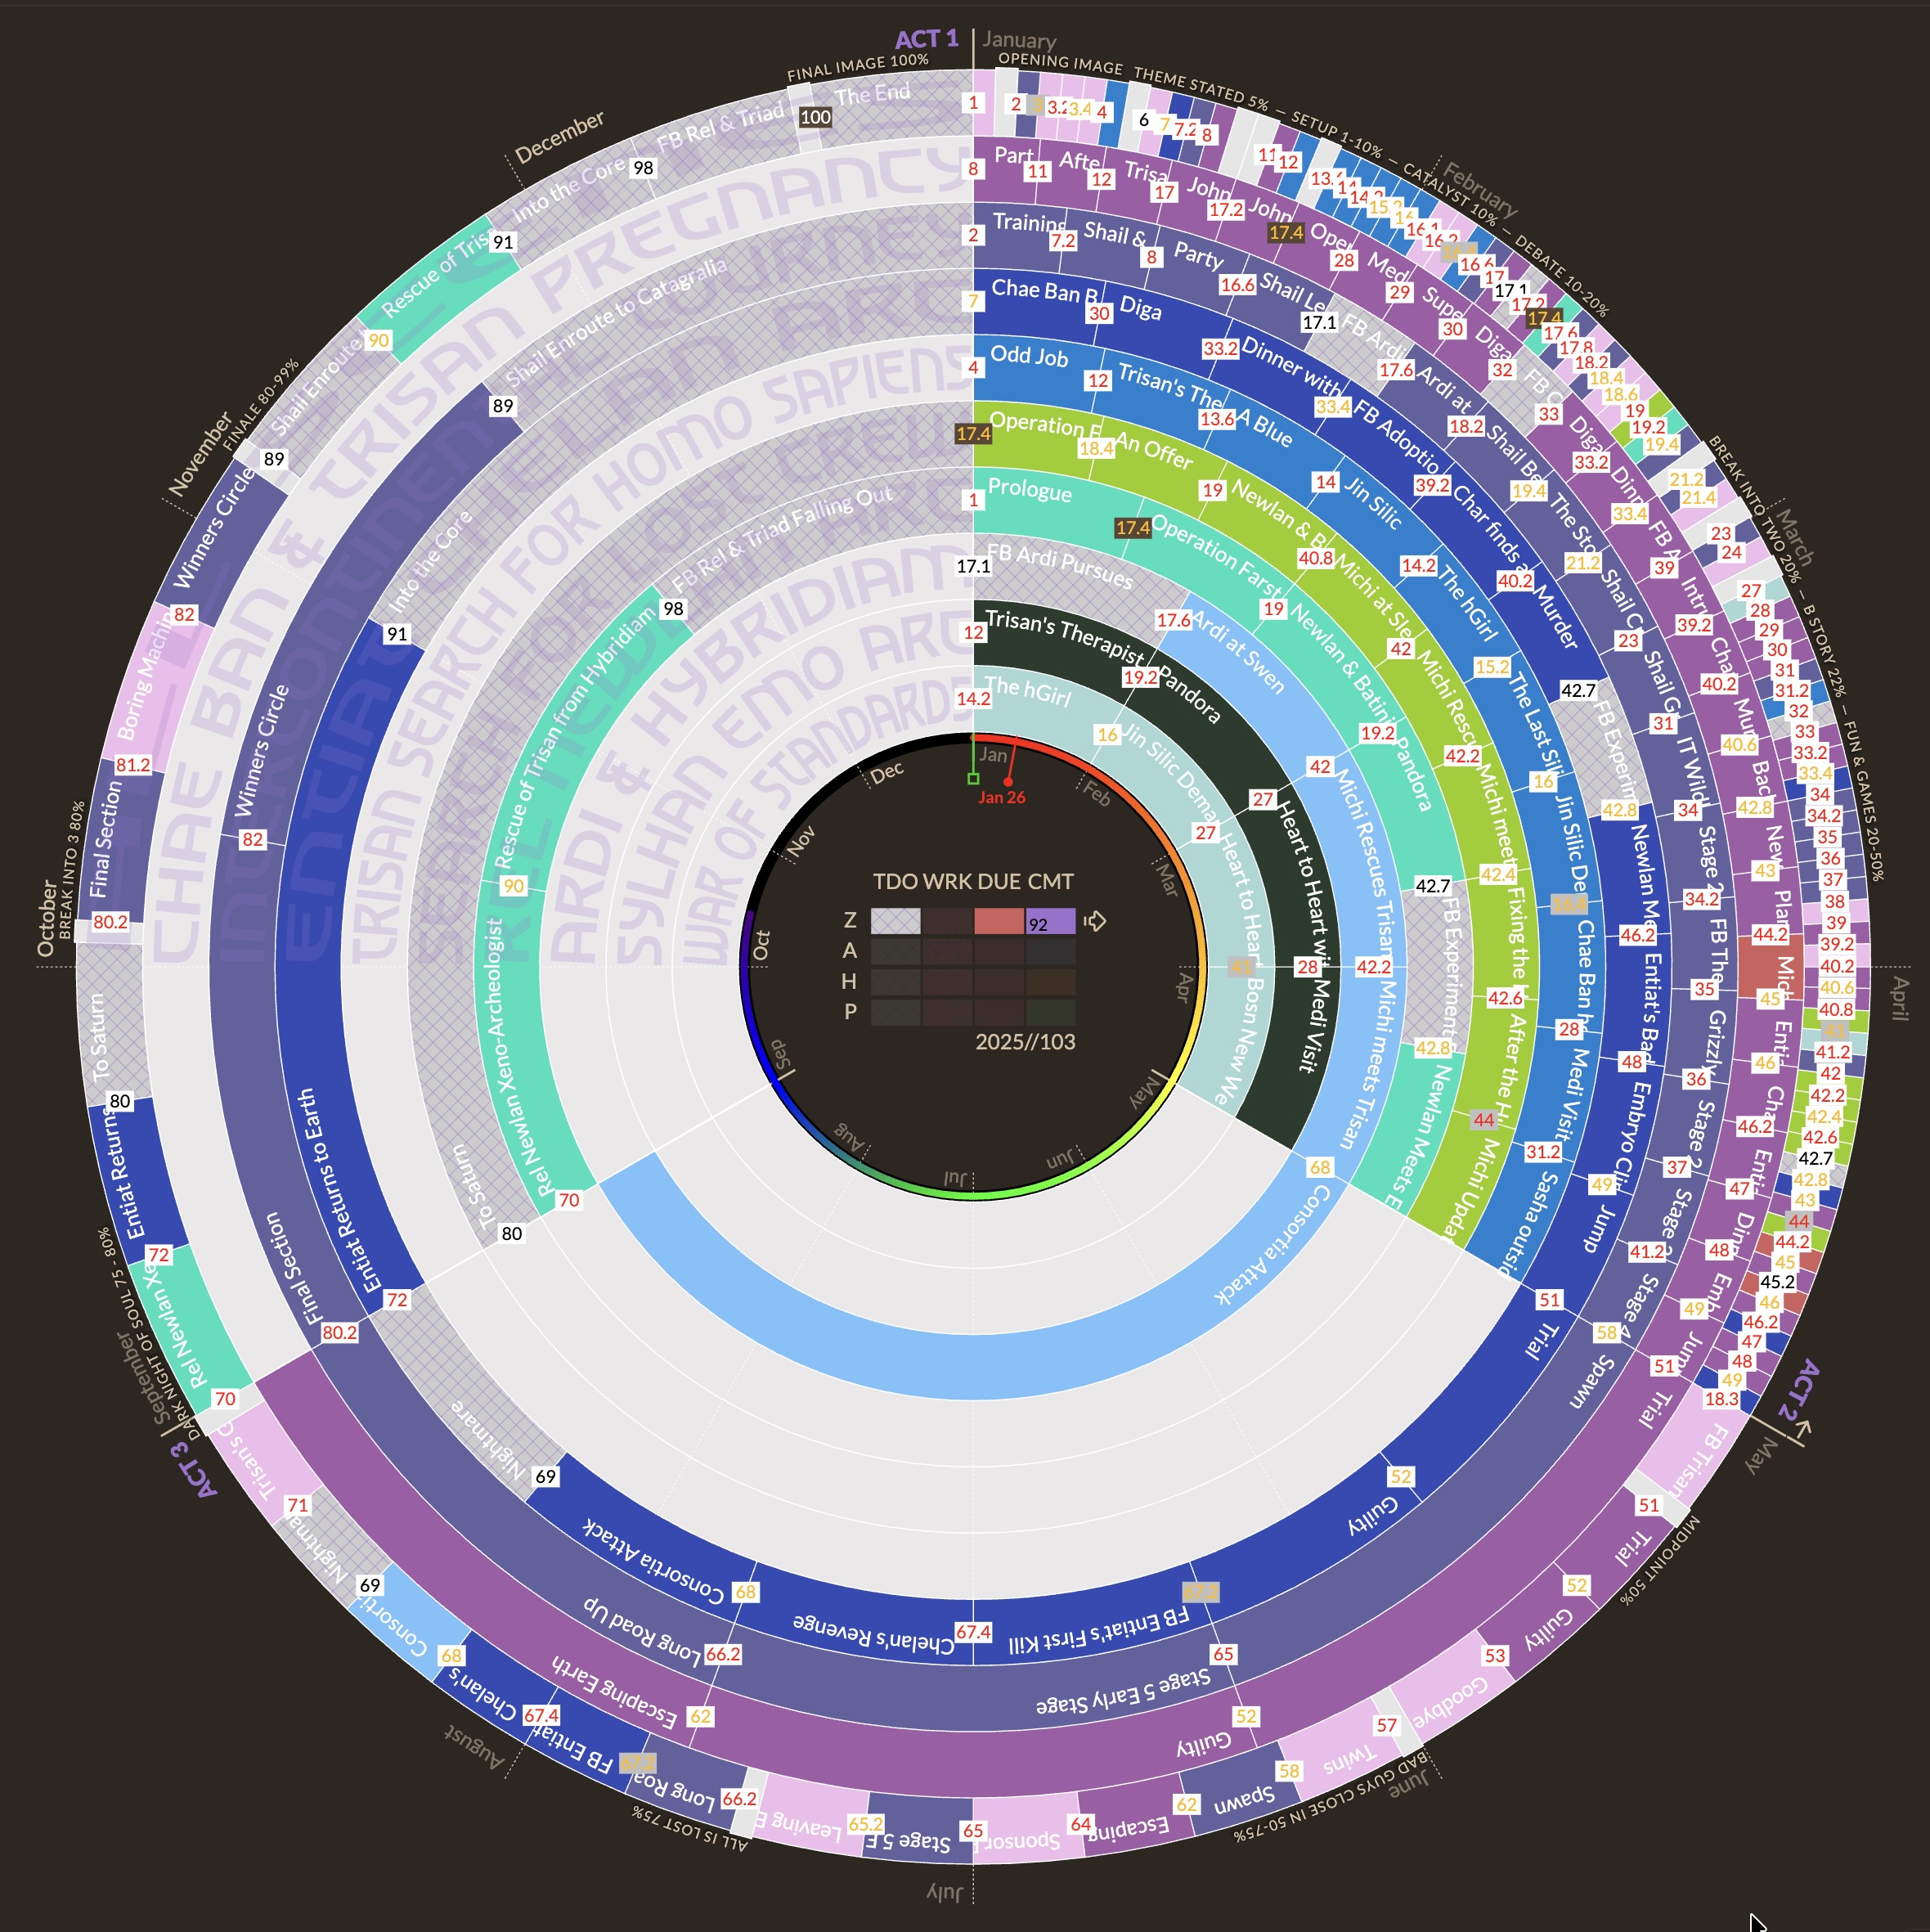
Narrative Mode is your primary manuscript-order workspace. It displays all scenes from all subplots on the outer ring, organized by act divisions (default 3 acts, configurable in Settings → Core → Acts). Each act spans an equal segment of the 360° circle. This view emphasizes Narrative time (the order readers will experience the story). Subplot colors show story structure and balance.
Key Features
Section titled “Key Features”- Structure: Scenes are distributed across Act 1..Act N (based on your Settings → Core → Acts → Act count).
- Book or Saga scope: Switch between one active book and a combined Saga view.
- Subplot Colors: The outer ring segments are colored by their subplot. This lets you quickly visualize which plot threads are dominant in each section of the book.
- Publishing markers: Optional outer-ring placards show the part and chapter markers you have placed on scenes.
- Story Beats: Displays story beats (like Save the Cat) along the timeline, helping you pace your narrative structure.
- Beat names in your book’s terms: Hold Shift to swap the beat labels to each beat’s In This Book name — “Debate” becomes “The Flight from Detection”. Shift also shows the subplot ring key.
- Interactive Reordering: You can drag scenes on the outer ring to reorder them. See Reorder Scenes for details.
- Scene right-click menu: Add a scene after the current one, set a chapter marker, change Status, change Publish Stage, or flag it for Pulse — see below.
- Recent moves overlay: Narrative Mode can show a top-left list of recent committed scene and beat moves. Toggle it in Settings → Advanced → Configuration.
- Runtime view: Click RT to see how long each scene runs and the running time of the book in reading order. See Runtime view.
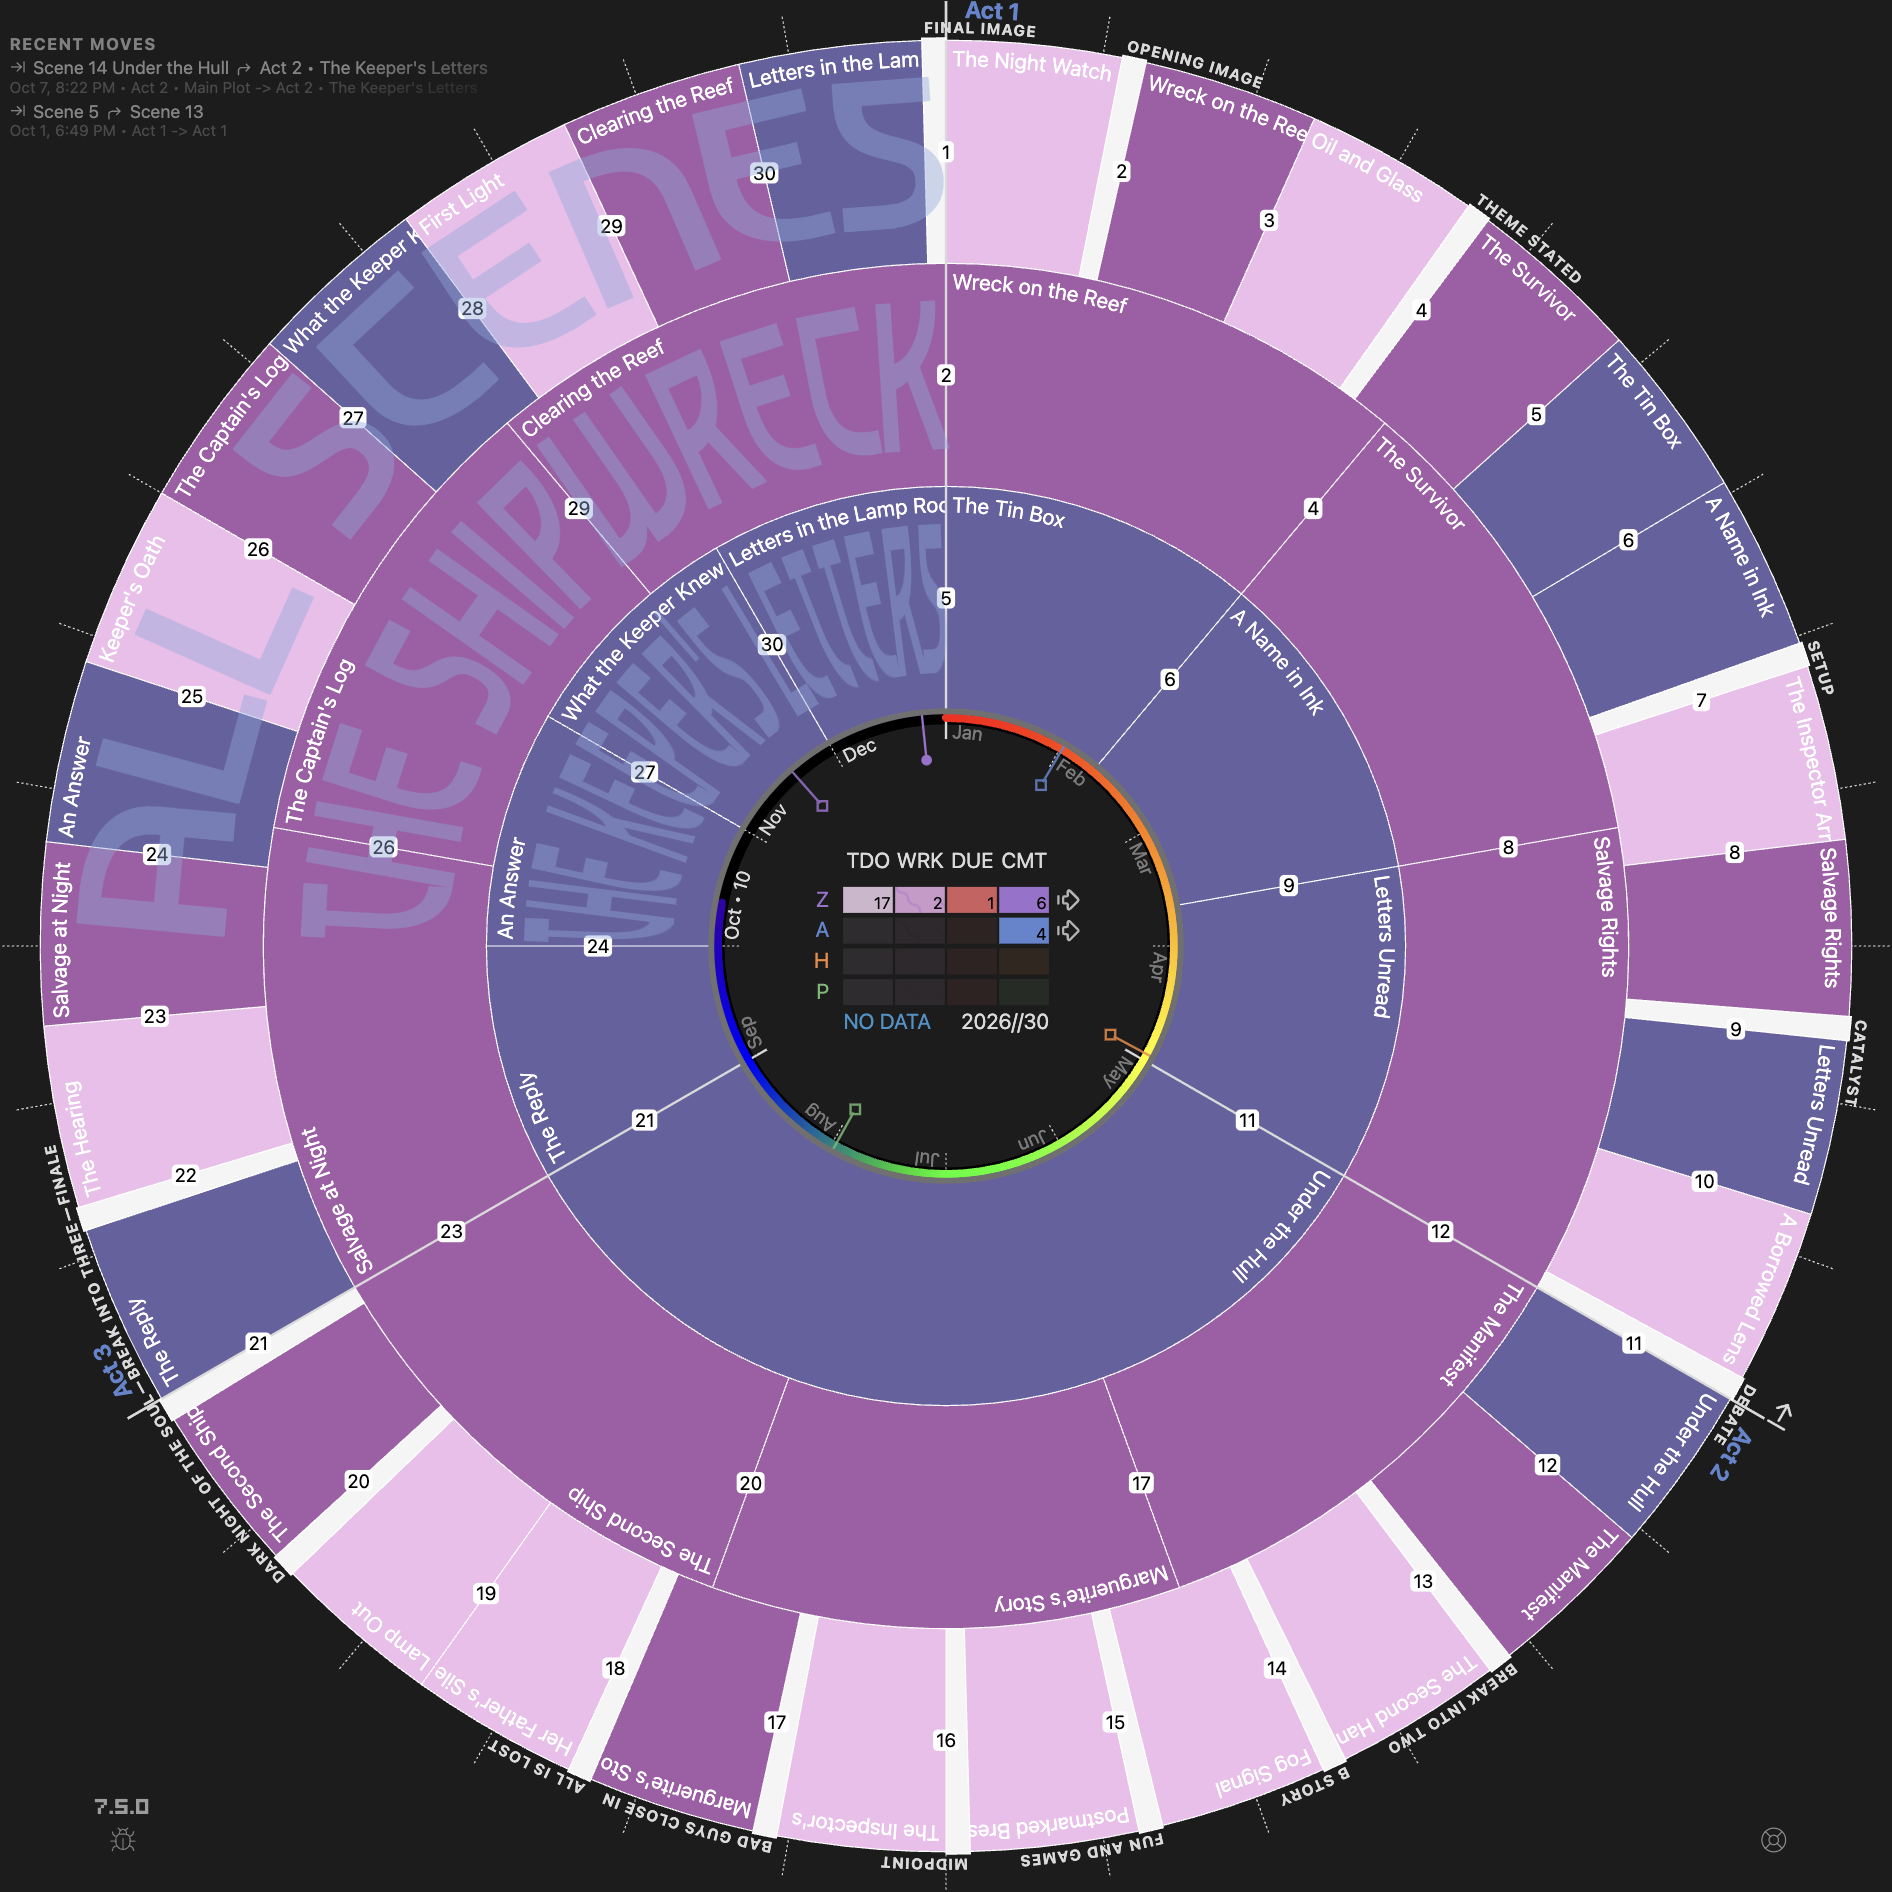
Save the Cat beats around the outer ring, with the recent moves overlay at top left
Subplot Alignment: Fill vs Sequence
Section titled “Subplot Alignment: Fill vs Sequence”The alignment chip at the left of the mode row switches how subplot rings lay out their scenes. It applies in Narrative, Chronologue, and Gossamer modes.
- Fill (default) — subplot scenes spread evenly across each act, so every ring uses its full arc. Best for reading each thread on its own.
- Sequence — every subplot scene sits at its true position in the full manuscript, aligned with the outer ring. Empty cells mark where a thread is dormant, so you can see at a glance where each subplot is active, where it disappears, and how the threads interleave across acts.
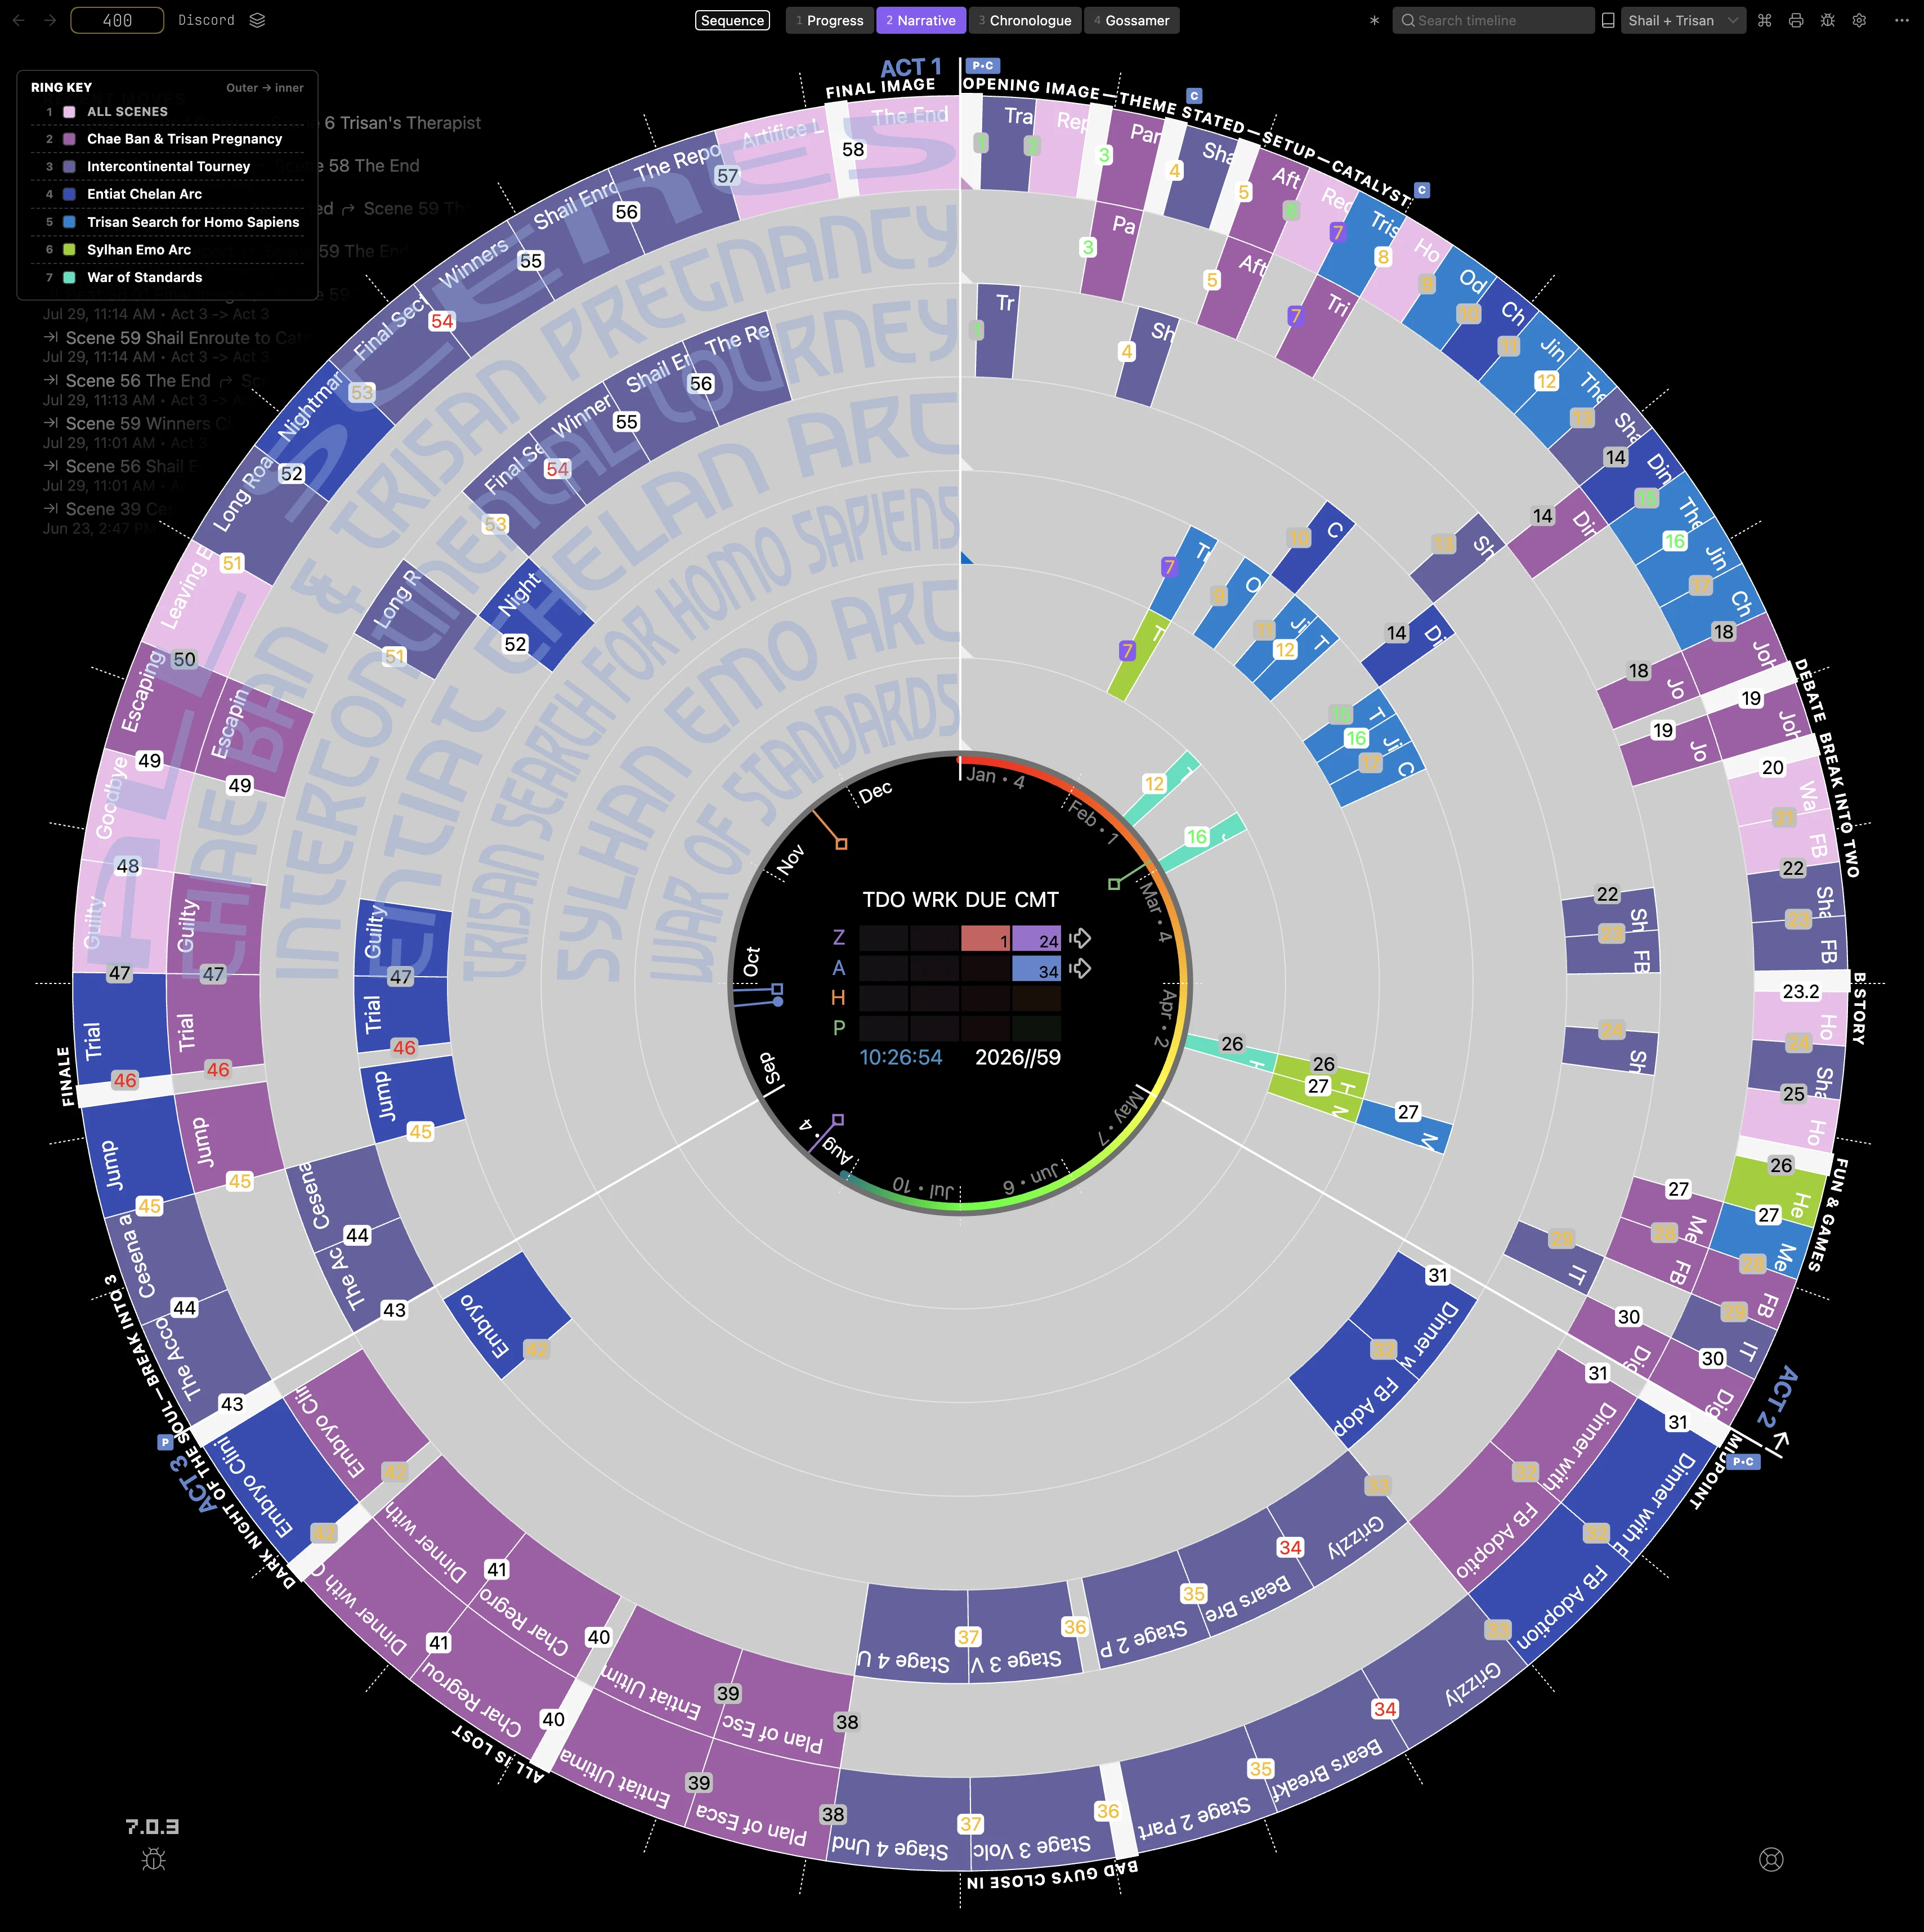
Sequence alignment — each subplot ring aligned to manuscript position; empty cells show where a thread is dormant
Runtime View
Section titled “Runtime View”Runtime follows narrative order — the order a reader, listener, or audience meets your scenes. The Runtime view shows how long each scene runs and how the minutes add up across the book.
- Turn it on with the
RTkeycap at the top left of the timeline, or the Runtime chip beside Narrative in the mode row. Click either again to turn it off. - Every scene keeps its equal slice of the ring. Inside each slice, a blue arc grows with that scene’s runtime, measured against the longest scene, with the scene’s runtime at the arc’s tip.
- A scene with no
Runtimevalue shows a short red stub, so you can see which scenes still need an estimate. - Around the perimeter, each tick shows the running time when that scene begins:
0:00at the first scene, and the book’s total at the end of the last. - Click any two scenes to see the runtime from the first through the second, both scenes included. Click a selected scene again to release it.
- The book’s total runtime appears at the center of the timeline.
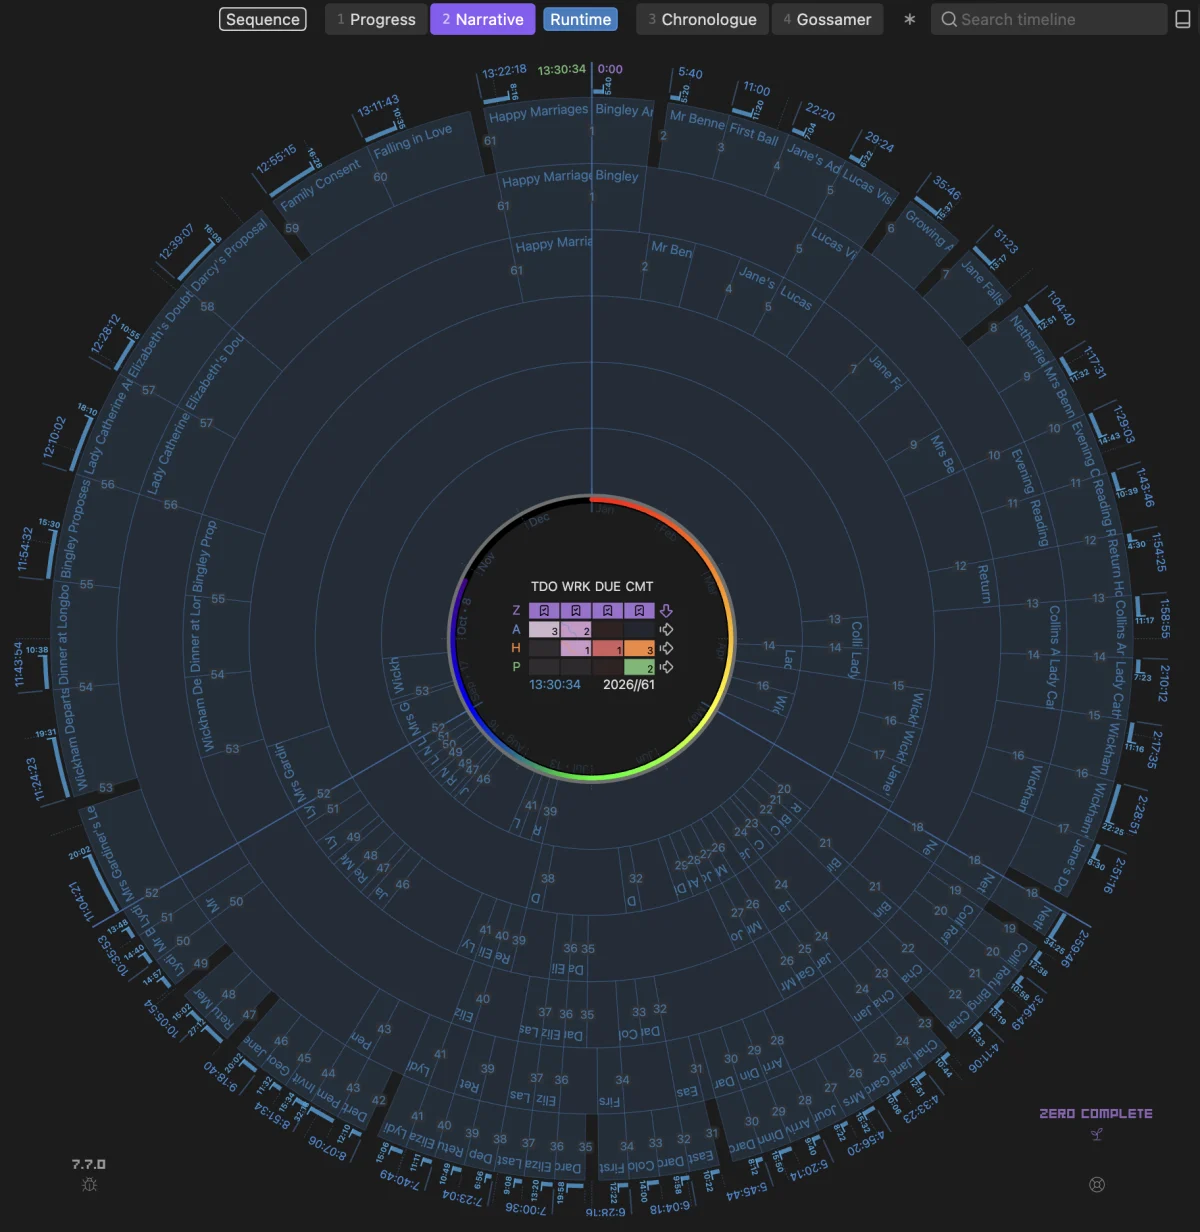
Runtime view — each scene's arc and the running time around the book
While the Runtime view is on, clicks select scenes for comparison; turn it off to open scenes or drag them into a new order. Act labels, beat labels, and chapter placards rest while the running totals use the perimeter.
Use cases:
- Screenplay pacing — Check act timing and scene balance in screen time
- Audiobook planning — See where each chapter starts in the listening time
- Podcast structure — Plan episode segments with time awareness
How to use:
- Enable Runtime Estimation in Settings → Core
- Configure a runtime profile matching your content type (Novel or Screenplay)
- Run Runtime estimator from the command palette to fill each scene’s
Runtime - Switch to Narrative mode (
2) and clickRT
Scene Right-Click Menu
Section titled “Scene Right-Click Menu”Right-click any scene on the timeline to open a context menu that lets you add a scene or update scene frontmatter without opening the note. The current value in each group is marked with a checkmark.
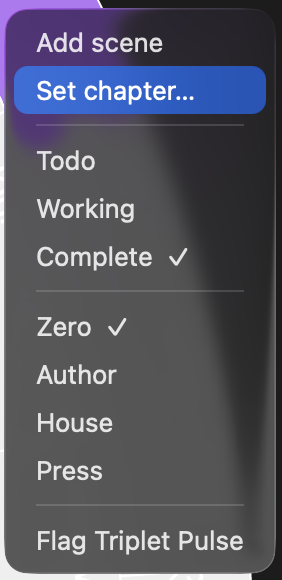
Scene right-click menu — Add scene, chapter markers, Status, Publish Stage, and Pulse actions
Add scene — inserts a new scene after the selected one, using that scene as the anchor for placement and context.
Set chapter — adds, edits, or clears the Chapter: marker on the selected scene. The panel previews current chapter containers so you can see how the marker affects the manuscript structure.
Status — set Status to Todo, Working, or Complete. When you mark a scene Complete, the Due date is automatically set to today, keeping the Progress Mode completion estimate and pace tracker accurate.
Publish Stage — set Publish Stage to Zero, Author, House, or Press. Useful for moving scenes through revision tiers without leaving the timeline.
Flag Triplet Pulse — sets Pulse Update: Yes on the scene so the next Scene pulse analysis run will reprocess it.
Remove from timeline — takes the scene off the timeline and out of the manuscript without moving or deleting the note. Only its Class property is removed; the note stays in its folder with its text, ID and every other property. The Timetable keeps listing it in place as a note with no Class, and Promote to scene puts it back as the same scene.
The timeline refreshes immediately to reflect the change.
Book and Saga Scope
Section titled “Book and Saga Scope”The title-bar book selector controls which manuscript the timeline shows.
- Choose a book to inspect one Book Manager profile.
- Choose Saga to combine all configured books into one multi-book Narrative timeline.
- Saga scope is available when more than one Book Manager profile is configured.
- Saga scope displays the combined manuscript order in Narrative Mode.
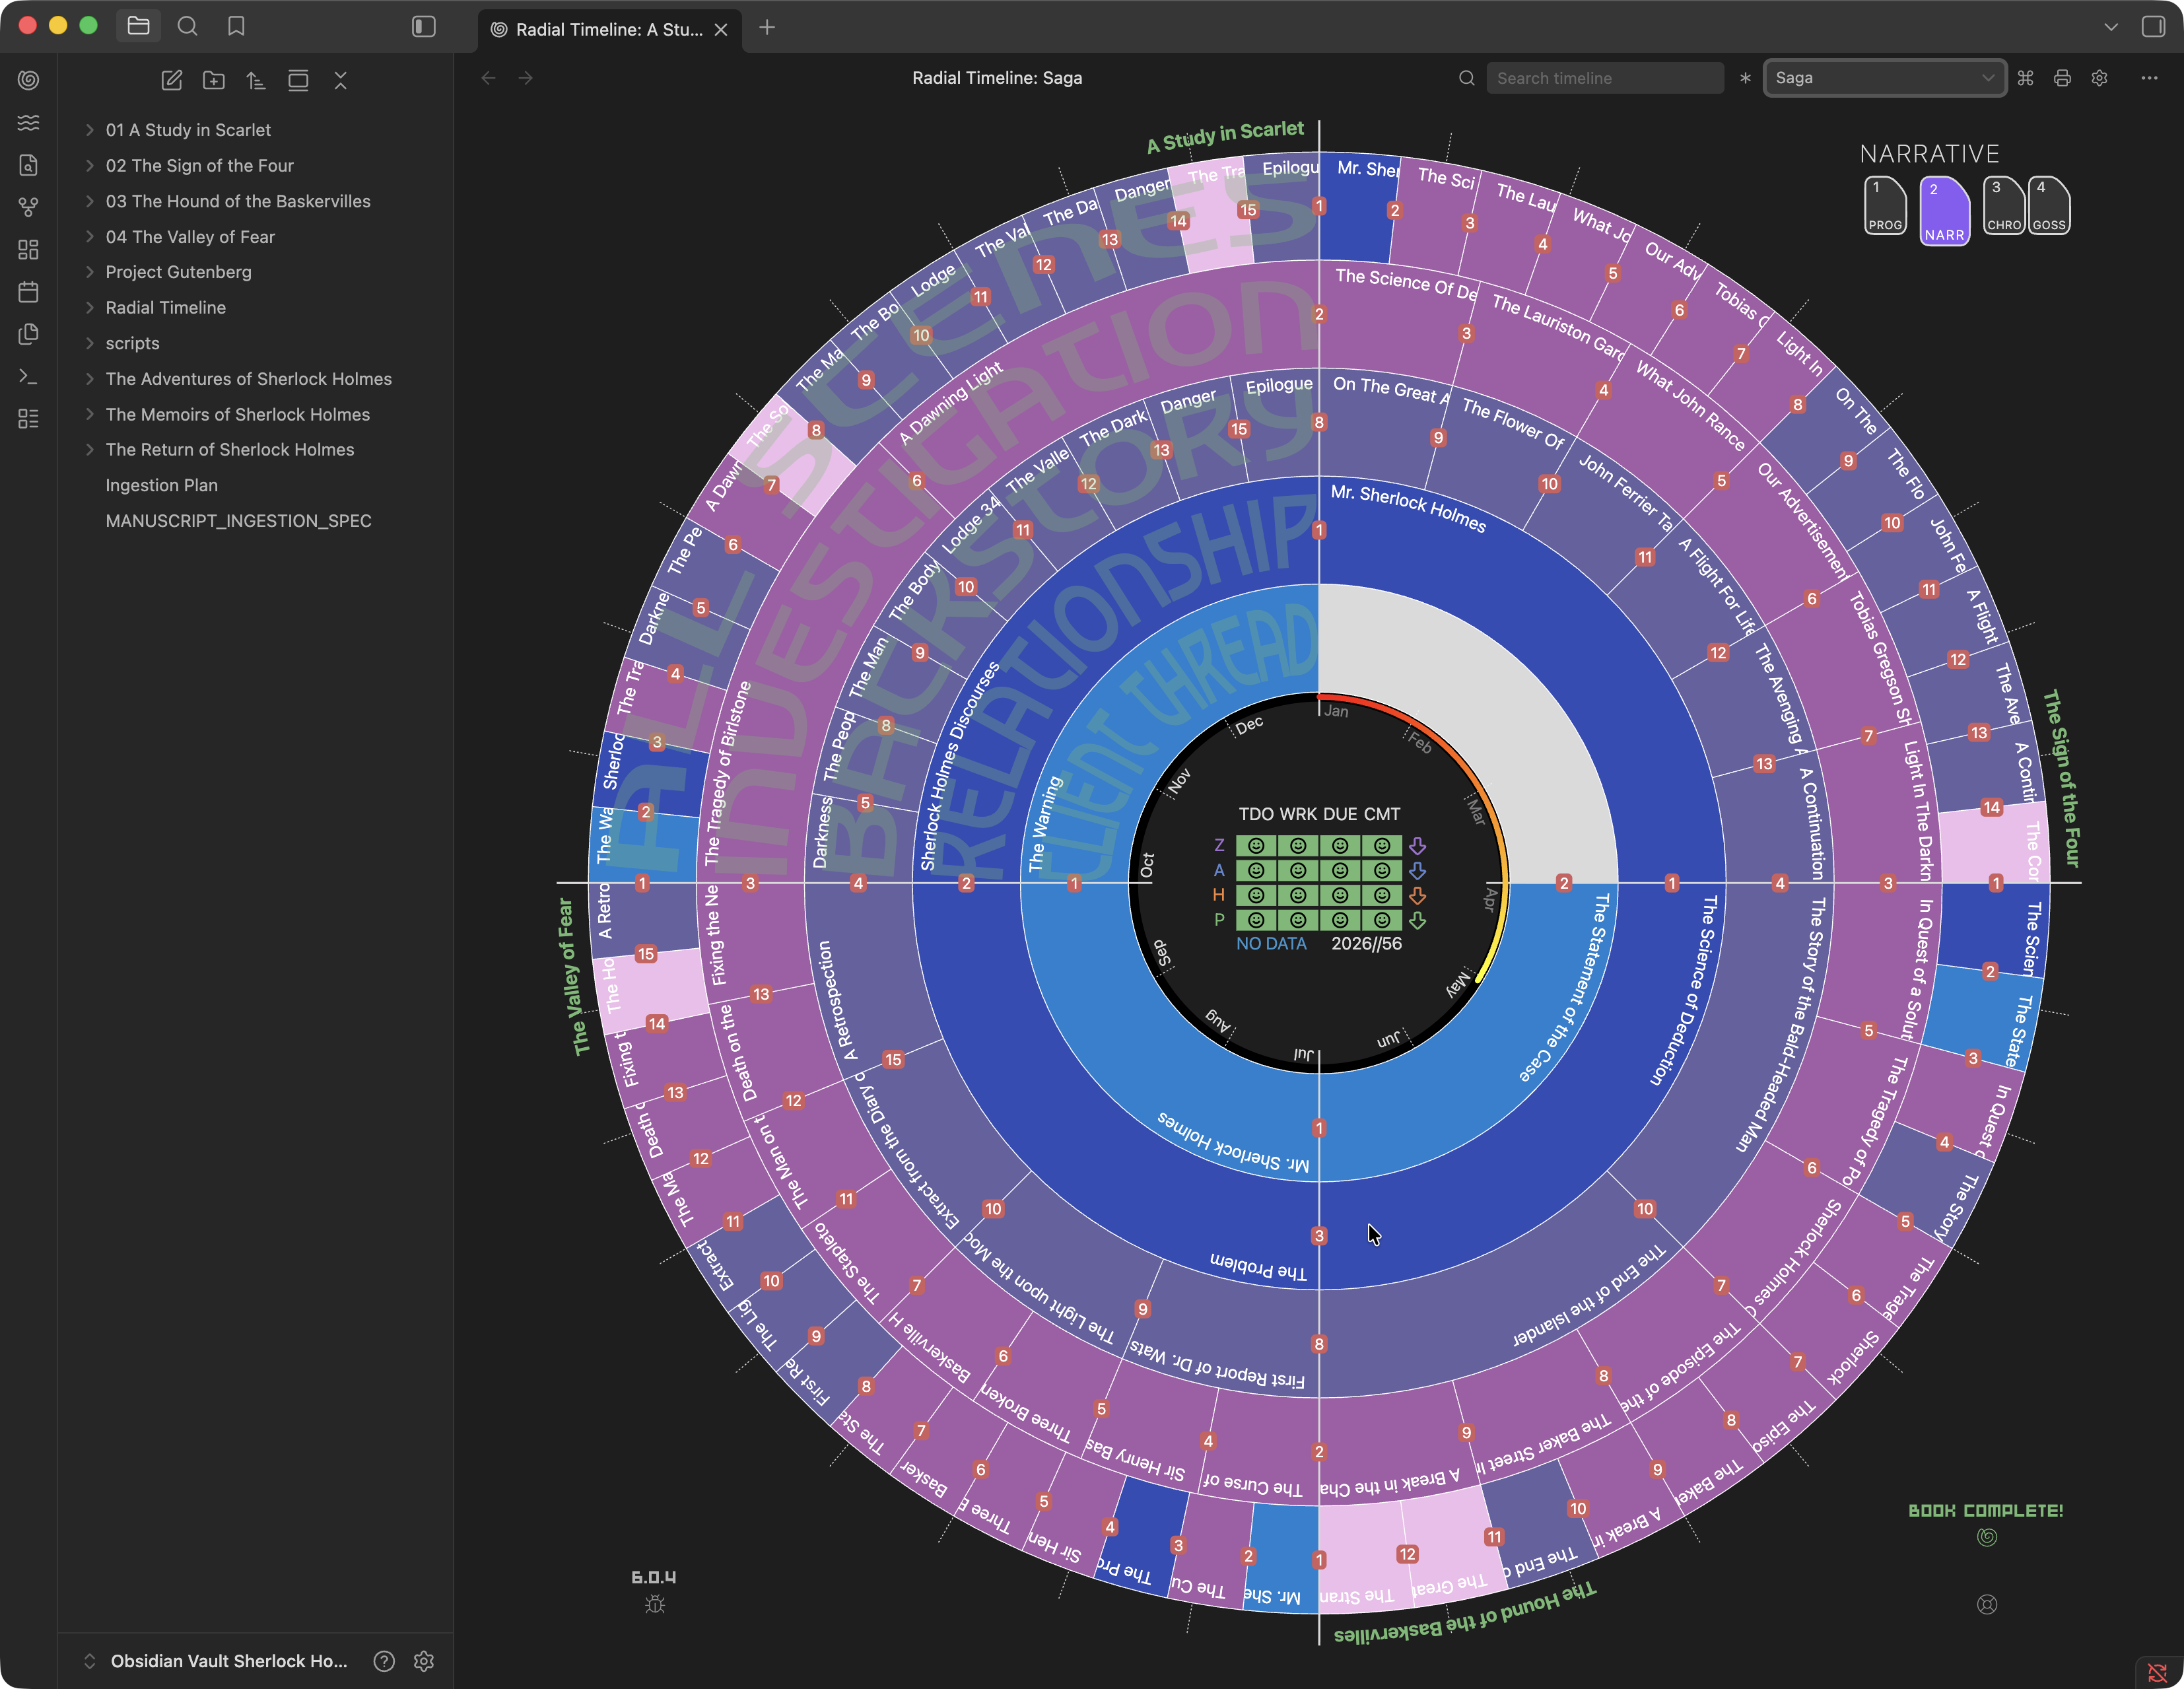
Saga view in Narrative Mode — multiple books combined into one manuscript-order timeline
Chapter and Part Placards
Section titled “Chapter and Part Placards”Narrative Mode can show publishing-aware placards on the outside of the scene ring:
- C — a
Chapter:field starts a chapter at that scene. - P — a
Part:field starts a part at that scene. - P/C — a scene that opens both.
Placards show the markers you place on scene notes. Set them from the scene right-click menu (Set part…, Set chapter…) or by editing the field directly.
Placards appear whether or not the selected PDF layout prints them — the marker is your structure, and the layout only decides what reaches the page. Hovering a P tells you what the current layout will do with it, including when that layout prints no Parts at all.
Turn placards on with Settings → Advanced → Configuration → Show part and chapter markers.
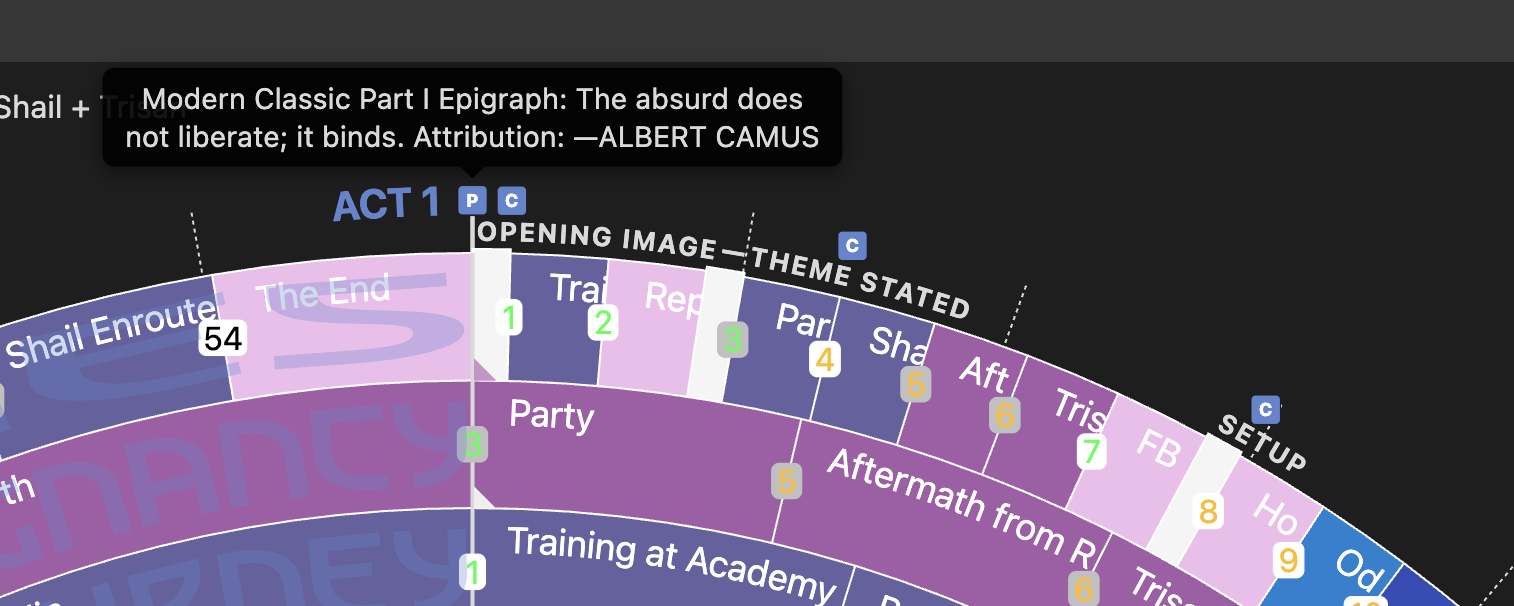
Publishing markers on the perimeter — chapter starts, part boundaries, and combined Part/Chapter breaks
Character Lanes
Section titled “Character Lanes”Character lanes follow the main characters through the book, in the order a reader meets the scenes. Up to four thin lanes sit just inside the outer ring, one per character, each in its own color.
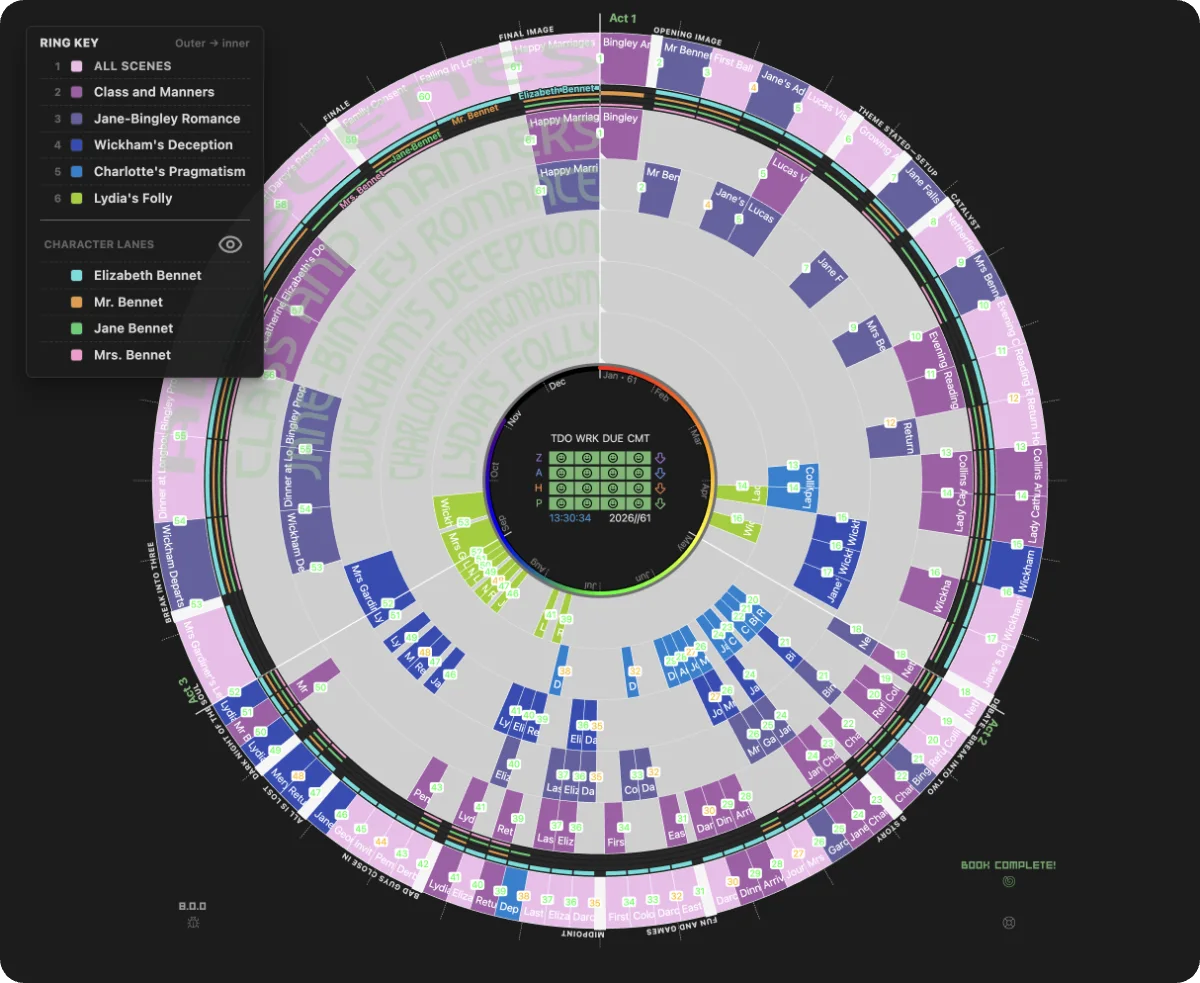
Character lanes with the ring key open — titles across the bottom of the wheel read upright
- Who gets a lane: the four characters who are POV in the most scenes. If fewer than four characters ever hold POV, the remaining lanes go to the characters who appear in the most scenes.
- Tall mark: a scene told from that character’s point of view.
- Short mark: a scene the character is in.
- No mark: the character is absent, so a run of empty lane shows how long they are gone.
A scene’s characters come from its Character: list. The first name is the POV character, or the first several when the scene’s Narration: names a count such as two, marked by the book’s narration. Hover a mark to outline it, light its scene and show the character’s name right beside it.
The names are in the ring key: hover or click the layers icon in the title bar, or hold Shift. The key lists the lanes below the rings, each beside its color, and while it is open the names also appear on the wheel, stepped back from 12 o’clock along their lanes. Hover a character in the key to light every scene they’re in, across all the rings. The eye button beside Character lanes in the key shows or hides the lanes.
The lanes take a little room from the rings. Turn them on with the eye button in the ring key, or with Settings → Core → Narration → Character lanes.
Dominant Subplots
Section titled “Dominant Subplots”When a scene belongs to multiple subplots, the outer All Scenes ring must choose one color. You control which subplot wins:
- Click a scene: Sets its dominant subplot. That subplot’s color is used for the scene on the outer ring, taking precedence over all others.
- Folded corner indicator: Each subplot ring shows a small folded corner motif at its start. The corner has three states:
- Missing — the subplot is not assigned to this scene.
- Gray — the subplot is assigned but is not dominant.
- Darker hue of the subplot ring color — this subplot is dominant and expressed on the outer ring above all others.
Headings set in Kalice, Claude Type, designed by Margot Lévêque.